

If you’re a business owner or operator who relies on compact lifting equipment for tight job sites, chances are you’ve worked with a spider crane before—whether you know it by that name or not. These little workhorses can squeeze through narrow doorways, lift loads to awkward heights, and navigate uneven terrain that would stop a regular mobile crane in its tracks. But here’s the thing: even the best crawler spider crane won’t perform at its peak if it’s not calibrated correctly. As someone who’s been supplying these machines for years, I’ve seen firsthand how a small calibration mistake can lead to delays, safety risks, or even damaged loads. Today, I’m breaking down exactly how to calibrate your spider crane step by step, no fancy degree required—just some common sense and a little prep work.
First, let’s get one thing straight: calibration isn’t just a “set it and forget it” task. It’s a regular maintenance step that keeps your crane’s systems accurate, safe, and long-lasting. When we ship a mini spider crane from our spider crane factory, it’s calibrated to factory specs, but after heavy use, moving the crane between job sites, or even storing it in extreme temperatures, those settings can shift. Skipping calibration might seem like a time-saver, but it’s a risk no operator should take.
Let’s start with the basics: what is calibration for a spider crane, anyway? Simply put, it’s adjusting the crane’s key systems—like its load moment indicator (LMI), boom angle sensor, and outrigger level—to make sure all the measurements the crane displays match the real, physical reality of the lift. For example, if your 10 ton spider crane thinks a load is 9,000 lbs when it’s actually 10,500 lbs, that’s a recipe for overloading and a potential tip-over. Calibration fixes that disconnect.

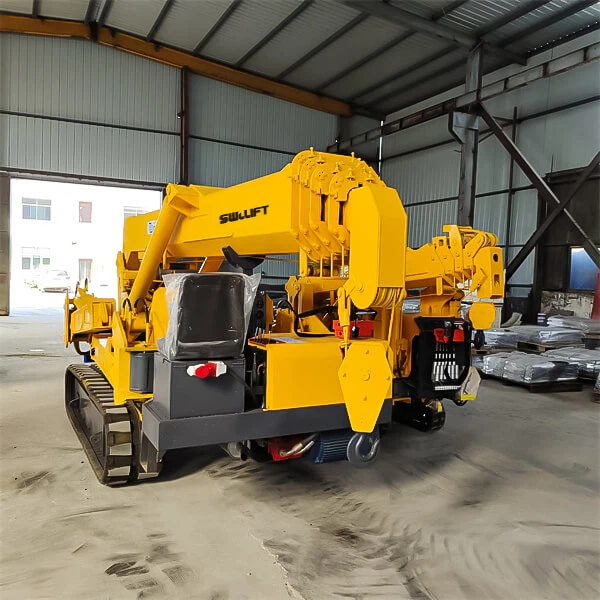
Now, let’s dive into the step-by-step process. I’ll make this as practical as possible, because I know you don’t have time for jargon-heavy tutorials.
Step 1: Prep the Crane and Your Workspace
Before you even touch any controls, you need to set up a safe, level spot to work. Spider cranes are designed to work on uneven ground, but calibration needs a consistent base. Find a flat, firm surface—like a concrete pad or compacted gravel—and park the crane there. Turn off the engine, engage the parking brake, and disconnect any auxiliary attachments (like vacuum lifts or slings) you might be using.
Next, check all the parts that will affect calibration. Inspect the outriggers for damage—bent or stuck outriggers will throw off your level readings—and make sure the boom isn’t dented or warped. If you’re working with a mobile spider crane, give the tracks a quick clean; dirt or debris under the tracks can make the crane seem level when it’s not. A quick tip: we always tell our customers to do a pre-calibration check before every big job, even if they calibrated last week. Small issues pop up fast.
Step 2: Level the Crane Properly
Leveling is the foundation of calibration. If your crane isn’t level, every other adjustment will be off, no matter how precise you are. Most spider cranes have a built-in spirit level on the control panel, but don’t rely on that alone—use a reliable manual level (like a 4-foot aluminum level) to double-check.
First, extend all four outriggers fully, then adjust each one until the crane’s main frame is level both side-to-side and front-to-back. For crawler models, you can use the track leveling controls to adjust one track at a time until the frame is straight. Pro tip: don’t skip this step even if the job site looks “mostly flat.” I’ve seen job sites that looked level but had a 2-degree slope, which is enough to mess up load calculations.
Step 3: Calibrate the Boom Angle Sensor
The boom angle sensor tells the crane how high the boom is extended, which is critical for calculating the maximum safe load. If this sensor is off, your LMI will give bad numbers.
Here’s how to calibrate it: retract the boom fully, so it’s lying parallel to the crane’s base. This is the “zero angle” setting, which you can confirm with your manual level—make sure the boom is exactly horizontal. Then, go to the crane’s control menu (it’s usually a digital screen on the remote or cabin) and select “Calibrate Boom Angle.” Follow the prompts to save the zero-angle setting. Next, extend the boom to a known angle—say, 30 degrees—using a protractor (or the crane’s built-in angle gauge, if it’s accurate). Input that angle into the menu and save it. Most cranes have a couple more angles to calibrate, like 60 degrees, but even doing zero and 30 will get you most of the way there.
Step 4: Calibrate the Load Moment Indicator (LMI)
This is the most important part of calibration, because the LMI is what keeps you from overloading the crane. The LMI uses inputs from the boom angle, length, and load to calculate the maximum safe weight for your current setup. If the LMI is calibrated wrong, you could accidentally lift too much.
Start with a “known load” test. You’ll need a weight you can trust—like a certified test weight from a hardware store, or even a stack of marked buckets with a total weight you’ve confirmed with a scale. For a mini spider crane, a 500-lb test weight works; for a 10 ton spider crane, use a test weight that’s about 70-80% of the crane’s rated load at that boom length (never use a weight over the rated load).
Hook the test weight to the crane’s hook, then slowly lift it a foot off the ground. Check what the LMI displays for the load. If it’s not matching the actual weight of the test load, go into the LMI calibration menu and adjust the “load calibration factor” until the display matches. Do this a couple more times with different weights—say, 50% and 90% of the max load—to make sure the LMI is accurate across the board. This might seem tedious, but it’s way better than the alternative of a overloaded crane on a job site.
Step 5: Test the Calibration with a Practice Lift
Once you’ve adjusted all the settings, don’t just head to the job site right away. Do a small, safe test lift to make sure everything works. Lift a load you know is well under the crane’s rated capacity, check the LMI, boom angle, and level readings to make sure they’re all consistent. For example, if your test load is 1,000 lbs, the LMI should read 1,000, the boom angle should match what you set, and the crane should stay level with no leaning.
If anything feels off—like the LMI jumps a little when you lift, or the boom angle is 2 degrees off—go back and recheck your calibration steps. It’s way easier to fix issues in the shop than on a busy job site with a deadline looming.
Now, let’s talk about how often you should calibrate. For regular use (like daily lifts on construction sites), do a quick calibration check every week, and a full calibration (all steps above) every 3 months. If you’re using your mobile spider crane on a new job site with rough terrain, or if you’ve had the crane hit something (even a small bump while moving it), do a full calibration right away. And when you order a crawler spider crane or any model from our spider crane factory, we include a quick start guide with calibration tips specific to that model—make sure to keep that handy.
Wait, I know some of you might be thinking: “Can’t I just skip calibration if the crane seems to work?” Let me tell you a story. A few years back, a customer bought a mini spider crane from us, and they skipped calibration because “it worked fine when it was new.” After 6 months of lifting heavy air conditioning units on a rooftop, the boom angle sensor had shifted just enough that the LMI thought a load was 1,200 lbs when it was actually 1,500 lbs. They tried to lift a new unit, the crane tipped slightly, and they damaged the unit and the crane’s tracks. That cost them thousands in repairs and lost time on the job. Don’t be that customer.
Another thing to keep in mind: different spider crane models have slightly different calibration steps. A 10 ton spider crane will have a heavier LMI calibration than a mini one, for example. That’s why when you’re shopping, it’s good to ask your supplier for model-specific calibration tips. If you’re looking for reliable machines, our range—from crawler spider cranes to mobile models—comes with clear calibration guides and customer support to walk you through any steps.
Let’s also clear up a common myth: you don’t need special tools to calibrate your spider crane. A manual level, protractor, and certified test weight are all you need—no fancy equipment required. If you’re unsure about any step, don’t hesitate to reach out to the supplier. We’ve helped dozens of operators work through calibration issues over the years, and we’re happy to walk you through it over the phone or via email.
Now, when should you call it quits and get a new crane instead of calibrating? If your spider crane has been in a major accident—like a tip-over or a collision—calibration might not fix hidden damage, like a bent boom or faulty sensor. If you notice consistent errors even after calibrating, that could be a sign of worn parts, not just off settings. In that case, it’s time to check with your supplier to see if repairs are worth it, or if it’s time for an upgrade.
At the end of the day, calibration is all about keeping your crew safe, your jobs on schedule, and your crane running smoothly. It’s a small step that makes a huge difference. Whether you’re using a crawler spider crane for tight interior jobs or a 10 ton model for heavy outdoor lifts, taking 30 minutes to calibrate it properly will save you headaches later.
If you’re in the market for a spider crane that’s built for easy maintenance and clear calibration guidance, browse our range of crawler spider cranes, mini spider cranes, 10 ton spider cranes, and mobile spider cranes. Our spider crane factory designs machines with user-friendly controls and durable parts, so calibration is a breeze, not a chore.
References:
- Occupational Safety and Health Administration (OSHA). (2022). Crane Calibration and Safety Standards for Compact Lifting Equipment. U.S. Department of Labor.
- International Organization for Standardization (ISO). (2021). ISO 12482: Cranes – Safety Requirements – Spider Cranes. International Organization for Standardization.
- Crane Tech Magazine. (2023). “Calibration Best Practices for Compact Crawler Cranes.” Crane Tech Publications.